
Get The Right Greases – Thrust Bearing Assembly – Spring and T-nut Placement – Break-In Your Diff – and link in your quest to How to Build a Ball Diff (Right)
This site contains affiliate links. When you click links, Especially with the word (Ad) you Help the site Grow. The site may receive a commission, at no additional cost to you!
Table of Contents
1. Clean Oils Off
Cleaning all oils off (mainly on the ring and balls) will help the diff not slip. The best way to clean oil off is with some type of motor spray (brake cleaner is probably the best to use) and shop towels. The cheaper way is isopropyl alcohol and a paper towel.
Cleaning oils off YouTube clip
Best cleaning gear – Brake Cleaner Brakleen – Scott Shop Towels 12 rolls
2. Get The Right Greases
This might be the most important step. Get the wrong or crappy greases and the diff might not work right or won’t last long. For the diff balls and rings – you need a thick silicone-based grease (usually clear). For the thrust bearing, you need a good grease that can take temp well (usually black).
Best greases for diff balls and rings – JConcepts RM2 Diff – Hudy Diff (super or regular)
Best greases for thrust bearing – 110% Racing RC Blood (red) – JConcepts rm2 heavy-metal
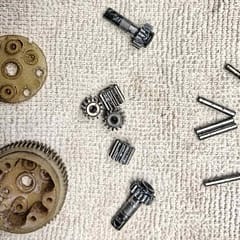
3. Thrust Bearing Assembly
Start with the bolt and the one thrust-washer. You want to place your first thrust-washer through the bolt with the grove facing the threads. #2 – put a good amount of thrust-bearing grease in the grove of the thrust washer (This helps hold the balls in place). #3 – Make sure you have the right amount of balls for your thrust-bearing kit (some kits give you extra balls) and place them on top of the grease that you just put on the thrust-washer (some kits come with caged thrust-bearing – making it easier). #4 Take the 2nd thrust-washer, put a bit of thrust-bearing grease on it, and place it with the grove facing the balls. #5 Sandwich the assembly together without the balls falling out and place it to the side. (The final order of the sandwich) bolt – grease – thrust washer (grove up) – balls – grease – thrust washer (grove down).
Thrust bearing assembly #1 YouTube clip – Thrust bearing assembly #2 YouTube clip
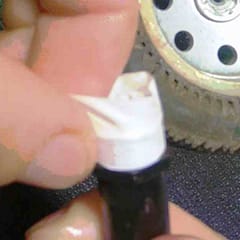
4. Grease up The Rings (Ball Diff Grease)
Start with using the diff-grease (thick silicone-based grease) on the outdrive where the rings sit. This does two things. (1) Stop metal-to-metal contact with the ring and the outdrive. (2) Helps stop the diff ring from falling off outdrive when assembling. Now, place the ring on the outdrive and apply some diff-grease to the exposed face.
Grease up the rings YouTube clip
5. Place Ball Bearings
This step is easy – just place one on each of the outdrives housing. one will go inside and the other will be on the shaft side. note some (usually older) outdrives the shaft side will move and slide out, you will need to put the shaft in, also on these types – it’s sometimes better to put the bearing on the diff gear over the shaft.
Place Ball Bearings YouTube clip
Older style placement on the gear YouTube clip
6. Grease up Your Diff Gear & Balls
I find the best way to start – is to use diff-grease in the holes on the diff-gear (where the balls go). Some put the balls in first but the grease helps stop them from flying around. #2 Now push the balls into the holes in the diff-gears. note – some diff-gears have a bigger opening on one side, this is the side you want to push the ball into. #3 Once you have all the balls in the hole – finish with a layer of diff-grease over the balls that have been set in place. #5 You can now place your gear on the shaft side outdrive.
Grease up Your Diff Gear & Balls YouTube clip
7. Spring and T-nut Placement
After placing your gear on your shaft side outdrive. Take the same outdrive and place the spring in the hub. Note – some springs need to be compressed with pliers to get them unstuck, making it easier to get everything together. after doing this #2 now place the t-nut on top of the spring. You want the thread side of the t-nut facing the spring. #3 At this point you can place the other outdrive on the gear.
Spring and T-nut Placement YouTube clip
8. Bolting The Diff Assembly Together
Once you set the two Outdrives on the gear take your Thrust Bearing Assembly (in step one) and place it on the opposite side of the t-nut and spring. You will need to keep a good grasp on the t-nut and push down (if not it will fall out). Take your driver (usually 2mm hex or flathead) and place it in the Thrust Bearing Assembly outdrive side. “now push down on both sides (with one hand on the t-nut and the other on the driver) you don’t want to strip out the t-nut.” and spin the driver clockwise – everything should start thighing up. “do not thighing it up all the way”. at this point – only thighing it up where it is stung and the diff is lightly clamped.
Bolting The Diff Assembly Together YouTube clip
Why I NEVER Overtighten My Ball Diff! YouTube video
9. How To Break In a Ball Diff (Ball Diff Adjustment)
Before you run you must break-in your diff. The best way is to put the diff back into the car and hook everything up. With your diff still loose – set the trim of your controller where your tire barely moves. Hold one tire (or stick the hex driver in outdrive) and let one side spin for 5 minutes. After the 5 minutes is up – tighten the diff up a bit and hold the other side for 5 minutes. Repeat this till the diff feels smooth and tight enough that the diff won’t slip under load.
Ty Tessmann Pro Tip: Ball Diff Break-in YouTube Video
(Extra) If you want a quicker alternative to 9. Break-In Your Diff – you can tighten the diff assembly until you can’t spin the diff gear while holding the two outdrives hex tools (This YouTube clip will help you understand – Quick way to tighten the diff). The break-In process can now be done at the track – run for 5 mins at 25% power and bring it in and tighten the diff a bit… do the same for 5mins at 50% power – 5 min at 75% power – 5 mins at 100% power, with all power levels tighten the diff a bit (a bit is less than a 2hours on the clock – 1/6 turn – 16%) the only time you tighten more than this if the diff is slipping. Make sure it’s the diff slipping and not the slipper clutch. You could tighten the slipper clutch all the way down to make sure it’s not the slipper clutch. (This is my preferred method because I can drive the car but most Pro racers use the top method).
10. Quick YouTube Summery by Spencer Rivkin
Other Useful Links in your Quest for – How to Build a Ball Diff (Right)
Spencer Rivkin on youtube.com – How to Build a Ball Diff
Ryan Maifield on youtube.com – Ball Differential Build – Tips & Tricks
rccaraction.com – How To Understand Differentials
sodialed.com – How to Build the Perfect Ball Diff
rc10talk.com – Ball diff maintenance
rccaraction.com – Avoiding Diff-aster
Ben Ray on YouTube.com – “How To Properly Build and Break In A Ball Differential and Slipper Clutch”
reddit.com – Ball diff on pavement and carpet?
rcshortcourse.com – Ball diff slipping no matter how tight?
hobbytalk.com – Please Help. I need to know how to build a smooth ball diff
Related posts:
 RC Diff Oil Tuning (Simplified)
 LEGO Speed Champions 76906: Inside the 1970 Ferrari 512 M Set + YouTube Build
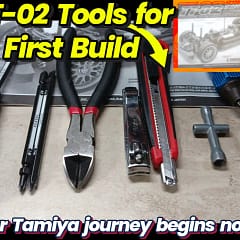 Your First Tamiya TT-02 RC Kit: Essential Tools for a Flawless Build
 (3 Easy Ways) How to Remove Small Stripped Screws
 How to Convert Servo Torque kg-cm to oz-in (Easy – Fast)
 3 Chassis Tricks for More Grip: Racer’s Beginner Guide
 Make Your Losi Mini-T a Off-Road Beast
 Rebuild Your Traxxas 2wd Differential
 Fix RC Shock Cap Leaks: Traxxas Ultra Shocks